Summary
This guide explains 'Delivery' phone orders in WaiterMate, including placing and managing orders, assigning drivers, and settling deliveries. The delivery module is a licensed software feature that is used in conjunction with phone orders. This feature stores customer details, adds delivery fees, and tracks driver activity.
Video Tutorials: Watch our Delivery Order Video Tutorial - Here And our Managing Delivery Drivers Video Tutorial - Here
Step 1 - Processing a Phone Delivery Order
1. Select the ‘Phone’ tab from the top of the screen, then the ‘New Delivery Order’ icon from the bottom of the screen

2. Find the customer.
- For existing customers, select from the list on the right or use the search fields on the left.
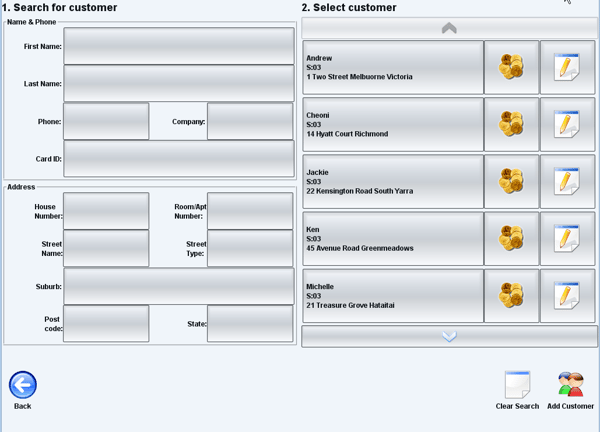
- If the customer is new, click the 'Add Customer' icon in the lower-right corner to enter their details

When selecting ‘Add Customer’ the following screen will display:
Fill in the mandatory fields outlined in red (first name and address). Other details are optional. Click 'OK' to save.

4. The Menu screen will appear once a customer has been added. Choose items from the sections on the left, then click 'Save' once the order is complete
5. The next screen will ask for confirmation of the order's due date and time, defaulting to today's date and 'NOW'. Adjust the date using the calendar or time using the arrows. Add comments or switch to a Pickup order if needed.

6. Select 'Ok' to save and send this order to the printers
Pre-paid orders
If the customer wishes to pay over the phone, the payment can be processed at the time the order is placed, by following the usual payment process.
Once the payment has been completed and 'Save' selected, the date and time screen will display the same as with an unpaid order.
Paying upon Delivery
If the customer wishes to pay cash upon delivery, this will be addressed further on in this article.
Step 2 - Viewing the orders in WaiterMate
Once saved, the order will be visible in the ‘Phone’ tab.
The order displays the customer name and address, the time due and the total amount due. Note that if the customer has already paid over the phone, the amount due will be $0 and the order will be shaded grey.
Pick-up phone orders will also display in this screen and can be distinguished from delivery orders by the icon; either a house for delivery or a phone for pick-up.

The way these orders are displayed can be changed by selecting the ‘Sort’ icon from the bottom of the screen. They can be sorted by 'Time Created' or 'Time Due'.


Step 3 - Assigning Orders to a Driver
Orders can be assigned to a driver in the system. This enables the user to keep track of which driver has which orders and the amount of cash that the driver will collect from the customer. The driver must first be clock on in the system.
Clocking on
1. Clock on by logging into WaiterMate, selecting 'System Admin' then 'Clock On/Off' and selecting 'Clock On'.

2. A prompt screen will ask the driver to confirm their float amount.

Handy Tip: ensure ‘Delivery Driver’ is ticked in the users screen in OfficeMate to enable a user as a driver.
The driver is now ready to be assigned orders.
Assigning Drivers to a Delivery
1. In the Phone screen, select the ‘Drivers’ icon

3. This will display a list of drivers who are currently clocked on in the system, select the appropriate driver and then select the ‘Assign Delivery’ icon at the bottom of the screen

4. This will display a list of unassigned delivery orders, select the orders you wish to assign to this driver and then select ‘Ok’. These orders are now assigned to this driver. Select ‘Ok’ to go back to the Phone screen.
Step 4 - Returning the Driver
Once the driver returns from delivering the orders, they must be returned in the system.
1. Select ‘Drivers’, then choose the driver, then select the ‘Driver Returned’ icon from the bottom of the screen

2. Select ‘Ok’ to confirm the return of the deliveries
3. The driver can be assigned deliveries and returned in this way as many times as is required throughout the shift.
Note: Some venues manually record the deliveries assigned to each driver and assign them in WaiterMate only at the end of the shift if time does not permit during the shift.
Step 5 - Settling the deliveries
Once the driver finishes their shift, their deliveries need to be settled.
1. From the ‘Drivers’ screen, select the driver, then the ‘Settle Deliveries’ icon from the bottom of the screen.

2. This will display a list of the deliveries for this driver with the float amount and total amount of cash on hand at the bottom of the screen.
Any orders which have already been paid previous to delivery will still appear in this screen, however the amount will not be included in the total.

3. Select the ‘Pay’ icon to settle these deliveries. The driver will hand over the necessary cash.
4. A prompt will then display asking if the driver would like to be clocked off. Select 'Ok' or 'No'

5. A driver summary can be printed by select the 'Print Driver Summary' icon from the bottom of the screen. This report will show all orders delivered by this driver with the total payment, clock on and off times, and a pay summary.