
GL Account Setup
In OfficeMate, navigate to Setup, Configuration, Accounting Integration, GL Account Setup.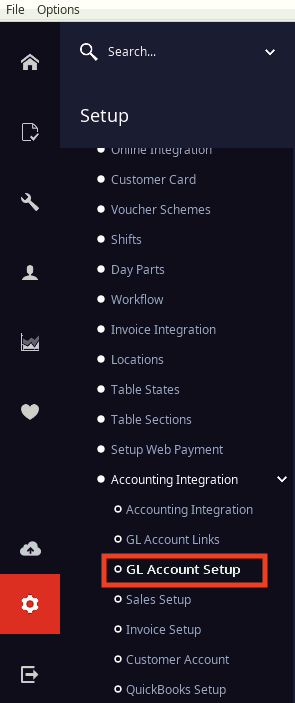
You will need to create accounts that will be mapped to different data from OrderMate. There are some default accounts already setup, but you can easily modify, add, or remove accounts from this screen.
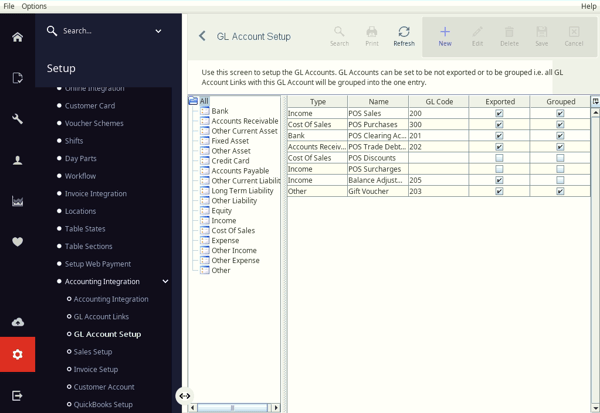
Adding a New Account
-
Click "New".
-
Select the "Type" from the drop-down list.
-
Enter a name for your account.
-
Enter the GL-Code that matches the account in the accounting system:
- Xero and MYOB: Enter the GL code from the Chart of Accounts.
- QuickBooks: Enter the account name from the Chart of Accounts instead of a GL code. For sub-accounts, use the format Header Account Name:Sub Account Name, with no spaces before or after the colon (
:).
-
Enter a description for the account. This will be useful later on so that you know what this account is being used for.
-
Select "Exported" so that this account will be included in the data export.
-
By selecting "Grouped", multiple instances of this account code in an export will result in one export line rather than multiple.
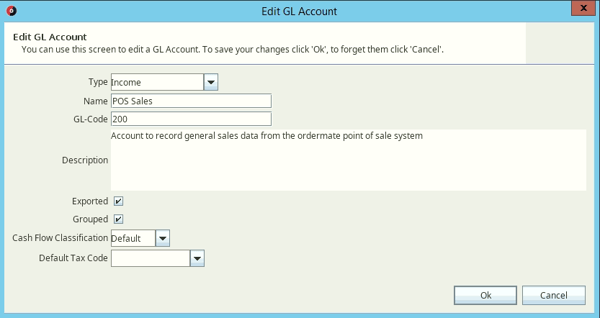
Optionally, advanced users may decide to select the "Cash Flow Classification" and "Default Tax Code" for the account. This is not required for the export to work. These fields are only used if you wish to export the whole list of accounts from OrderMate and use that file to configure a new MYOB company file.
Editing an Account
It is possible to simply click and modify the Type, Name, GL Code, Exported, or Grouped field. To edit a GL account's description or advanced fields, you must select it and click "Edit" on the toolbar.

Once you have completed working with accounts, remember to press "Save".

GL Account Links
Now that you have all of your GL accounts setup, it's time to link up these accounts to data fields. This can be done from the GL Account Links screen.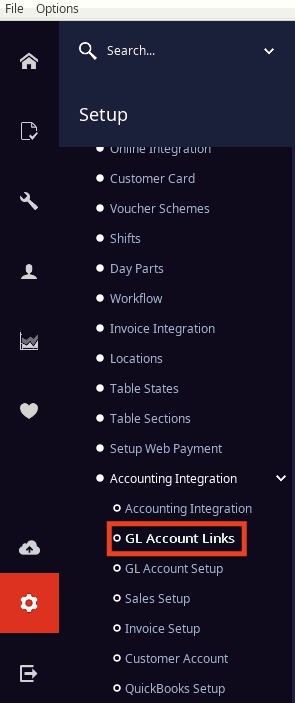
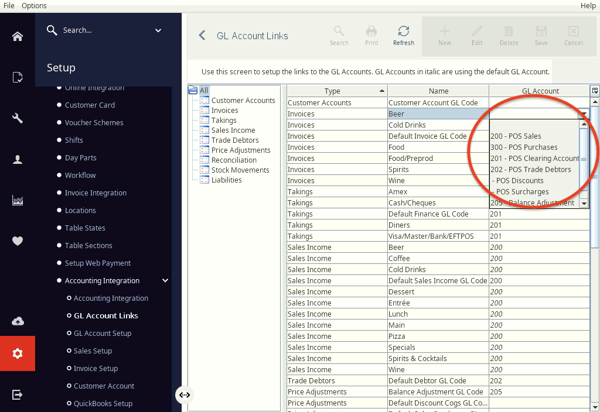
For each of the OrderMate data fields, select a GL Account from the drop-down. The drop-down list will display all GL Accounts setup in the GL Accounts Setup screen.
Note: GL Accounts displayed in italics are grouped, so will only export as one line. To enable or disable grouping for a GL Account, you will need to edit the account in the GL Account Setup screen.
When you're done linking accounts, be sure to save.
