Summary
OrderMate allows businesses to generate and manage Gift Vouchers that can be sold and redeemed through WaiterMate. These vouchers are customizable and can cater to different needs such as in-store and third-party purchases.
This guide will walk you through the necessary steps to set up and create Gift Vouchers in WaiterMate, as well as how to redeem them.
Step 1 - Configuration of Gift Vouchers
Before using Gift Vouchers in WaiterMate, they must be configured in OfficeMate. For full instructions on configuring Gift Vouchers, refer to the dedicated guide on Configuration of Gift Vouchers. in OfficeMate.
Step 2 - Create and Using Vouchers in WaiterMate
There are three main ways to create and use Gift Vouchers in WaiterMate:
(A) - Auto Create and Print a Voucher.
- From any account in WaiterMate, select the 'Account Admin' Icon.

- Select the 'Voucher Purchase' icon

- Choose 'Auto Create and Print'

- Select 'OK' icon to save and print the voucher.

- A scannable QR code voucher will be printed from the receipt printer.
- Hint: Make sure the printer has your business logo uploaded, so the voucher includes your details. Contact OrderMate for assistance with this.

(B) - Manually Create the Voucher number
- From the 'Voucher Purchase' icon, manually enter the Gift Voucher number using the following format:
- Prefix: Begin with "06" to recognize it as a Gift Voucher.
- Voucher Group Prefix: Use the prefix configured in OfficeMate (e.g., "Man" for manual creation).
- Voucher Code: Enter the code that is preconfigured in OfficeMate (ensure it's case-sensitive and of the correct length).

- After entering the information, select 'OK' to save the voucher.

(C) - Scan the Voucher
- Use a barcode scanner or swipe card reader (make sure you consult OrderMate about hardware requirements before purchase).
- Scan or swipe the physical Gift Voucher.
- Select 'OK' to save the voucher.
- Hint: Pre-creating vouchers in batches allows staff to only sell pre-configured cards, enhancing control over voucher sales.

Step 3 - Confirm Voucher Creation
Depending on your OfficeMate configuration, you might see a confirmation message after creating the voucher.
Click 'Yes' to confirm the creation.

Step 4 - Assign a Voucher Value
Once the Gift Voucher is created, a monetary value must be assigned.
Choose a value from the 'Quick Topup' panel on the left side or manually enter a value using the 'Value Deposited' keypad on the right side.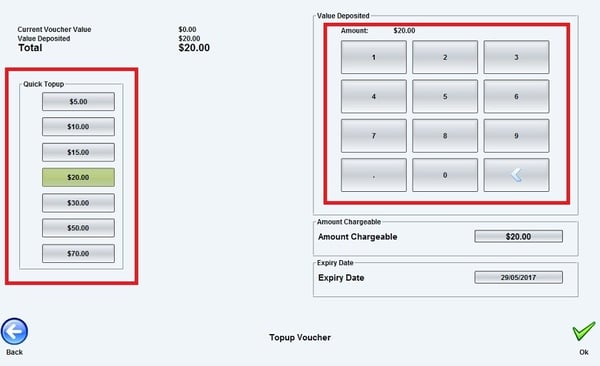
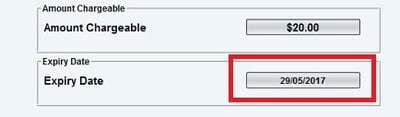
If needed, adjust the Voucher Expiry Date by selecting the field and editing it (this option depends on user permissions).
- Click 'OK' to save the voucher value.
- The voucher will now appear on the WaiterMate ordering screen, ready for payment.

Step 5 - Pay for the Voucher
Step 5: Pay for the Voucher
- Select the 'Pay' icon from the ordering screen.

- Choose the appropriate payment method as you would for any regular transaction.
- The Gift Voucher can be added to an account with existing menu items or purchased separately. Multiple vouchers can also be purchased in a single transaction.
Important Notes:
- Gift Vouchers cannot be used for complimentary vouchers, as they require a payment transaction when being sold. Donation or Complimentary Vouchers Guide
- Vouchers can work in conjunction with barcodes, manually created codes, or auto-generated QR codes for seamless integration.
- The setup and configuration of Gift Vouchers in OfficeMate is required before they can be sold or redeemed in WaiterMate.
.