Summary
Using a discount is the most appropriate way of handling charity, donation or complimentary 'Gift Vouchers'. This can be done by creating a 'Percentage' or 'Dollar' amount discount that is used when the customer redeems the voucher.
The debtor can be created 'when' the voucher is donated, and the discount pre applied if the permission to apply the discounts is required to be limited.
Note: The OrderMate Gift Voucher feature can not be used for complimentary vouchers as they require a Payment to be processed at the time of selling the voucher.
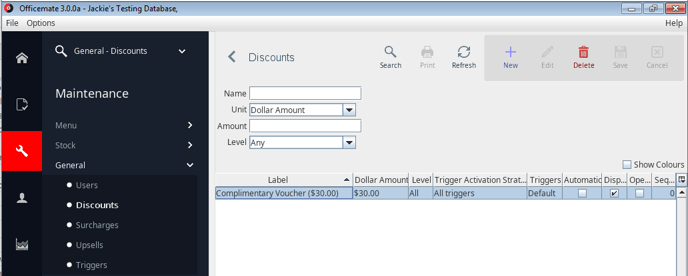
Step 1 - Create the Discount
Create a pre set 'Discount' in OfficeMate so that it can be later used to discount the sale when the customer redeems the voucher. This could be done as a percentage amount, but more often is created as a dollar amount discount. It may be necessary to create different discount amounts if the donations are not always the same denomination.
It is also possible to create discounts of the same amount, but named differently which does make them easier to see in the discount report, ie Local Football Club $30 & Local Netball Club $30.
Step 2 - Create The Debtor
Creating a debtor for each voucher at the time the voucher is donated will provide two main benefits. The first being that the value of vouchers that have been donated can be seen in a debtor report and the second is that the discount can be pre applied to the debtor. Pre applying a discount to the debtor means that a staff member does not need the permission to apply discounts to redeem a voucher.

Note: Important Information
- It is recommended that initially a new 'Debtor Group' is created so that the debtor reports can be filtered by them ie. 'Donation Vouchers'
- It is also important to make sure that these debtors have a credit limit of '$0'. If the credit limit is not set to $0, the customer could potentially order additional items to the debtor over the voucher amount.
Step 3 - Pre Apply the Discount to the Debtor
Once the debtor has been created, the discount can be pre-applied from the pay screen.1
1. Select the debtor-png.png?width=688&height=163&name=Select%20the%20debtor%20(2)-png.png)
2. Choose the 'Pay' icon from to enter the pay screen
3. Select 'Account Discount'

4. Select the desired discount

5. This will appear in the payment screen as a 'Debtor Adjustment. It will also leave the balance of the debtor as a negative dollar amount to the value of the discount / voucher
6. From the debtor screen, any debtors that have a negative balance applied, will appear in blue so that they can be easily identified

Step 4 - Redeeming the Gift Voucher (Use the discount)
When the customer comes in to use the voucher, place their order using the usual ordering process. This could be a table or a takeaway or any usual way used to process the order. When the customer pays the account either apply the discount to the sale (method A) 'or' use the debtor (Method B) depending on which set up was used.
Method A - Applying the Discount
- Open the account (table, phone order etc)
- Simply go to the pay screen and select 'Account discount'
- Select the desired discount
- Pay the remainder of the account

Method B - Using the Debtor
- Open the account (table, phone order etc)
- Go to the pay screen
- Make a part payment for anything over the amount of the voucher so that only the balance of the voucher remains. For example if the voucher is for $30 and the amount due is for $39.60, make a payment of $9.60 first so that the balance is for the whole amount. If the customer spend less than the voucher amount, this step is not required

- Still from the pay screen, select the payment type 'Customer Account' from the left hand side
- Select the desired debtor
- WaiterMate will then log out as the payment has been finalised and the sale will also be visible from the debtor along with the 'Adjustment' made earlier
