This article will explain:
- Why you may want to customise your dockets
- How to select the correct docket to edit
- How to show and hide certain lines on your prep docket
- How to change the font on your dockets for better visibility
- How to replace text on your dockets with custom text
Why customise your dockets?
You may want to customise your dockets to add or remove particular aspects, such as:
- Adding or removing the Account number
- Adding or removing Section names
- Adding or removing Cover numbers
- Changing the formatting of particular text on the dockets
OrderMate prep dockets can be configured to suit the needs of different venues. Making these docket customisations is simple. In fact, the prep docket in OrderMate has many lines that can be enabled or disabled, or the font size and colour changed. A lot of these lines are set by default and it's just a matter of making the changes you desire.
Handy Hint: When editing dockets, be very careful to test your changes to make sure you haven't accidentally hidden or changed critical lines for your venue.
Step 1 - Select a Docket to Edit
A sample of dockets are displayed in the docket 'Template editor'. To edit, first select the desired docket that requires the changes.
Handy Hint: You may need to place an order through the POS that includes the lines that you want to edit, for example, editing plusses and options.
1. In OfficeMate, navigate to the Template Editor or searching 'Docket Templates' in the search box

2. Select the 'Prep Docket' line

3. Select the 'Edit' icon from the top of the screen
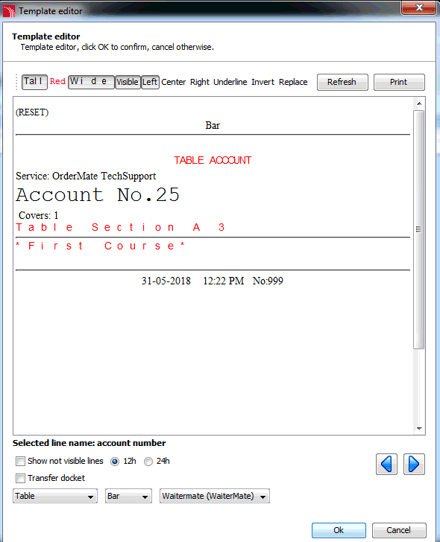
4. From the dialog box, select the filters from the bottom to narrow down the docket that you want to make changes to
Many lines available can be edited, however a lot of them are hidden so that a true preview of the docket is shown.
Showing these lines will enable you to edit them, and you can make formerly invisible lines visible, and formerly visible lines invisible.
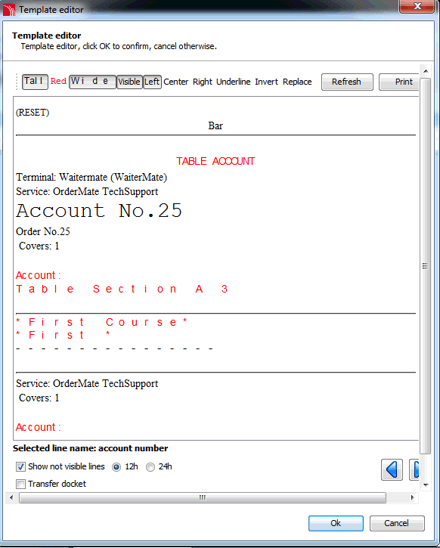
- To see all available lines, select the 'Show not Visible' tick box from the bottom of the dialog box
- Click on the line that you want to show or hide (eg Account No. 25 below)
- Select the 'Visible' icon from the top of the dialog box
- For a preview of the changes, deselect the 'Show not Visible' tick box
Step 3 - Changing the Font for better visibility
There are a combination of sizes and colours that make it easier for prep dockets to be read.
- Select the line you wish to edit (as above)
- Select any combination of the choices below for each line. These are at the top of the template editor.
- Tall
- Red
- Wide
- Visible
- Left
- Center
- Right
- Invert
- The current selection will be shown in the example and as a box around the selections made
Step 4 - Replacing Text on the Docket
Sometimes venue's prefer different wording than what is by default set on dockets. Some of the standard wording can be changed using the replace feature.
- Highlight the Text that you want to replace
- Select the replace button (a small dialog box will be shown, as below)
- Type the wording to be replaced in the 'Replace This' field
- Type in the wording that you want it to be changed to in the 'With This' field.
- Select 'Add' to repeat
- Select ok to complete and preview
If your changes are not visible, try again with part of the sentence.
Handy Hint: Not all changes are possible eg. Menu item names should be changed from the 'Items' screen in WaiterMate.

