Summary
This article explains what a combo is, the different types of combos, and how to set them up. Combos allow businesses to offer bundled items at a set price, often providing a discount compared to ordering items separately.
Video Tutorial: How to create a trigger
Combo Type
- Flat Price Combo
- Applies a flat price to a selected set of items within the combo
- Example: "Buy any coffee and any Cake for $8.50"
- Free Item Combo
- When a specific item or group of items is ordered, the customer can choose another item for free.
- Example: "Get a free House Wine with any Main Meal purchased."
- Buy x Get One Free Combo
- the customer can choose a selection of items, and the cheapest one will be free
- Example: "Get two Main Meals for the price of one."
- Discount Combo
- The customer recieves a set discount when a certain number or type of items are ordered.
- Example: "Get 20% off when you order 4 or more Pizzas."
- Plain Combo
- Simply groups the items together without altering the price.
- Example: "A Seafood Platter made up of several different full-priced seafood items."
Step One: Create a Combo
- In OfficeMate, navigate to "Combos" under Maintenance/Menu.

- Select 'New' in the toolbar.

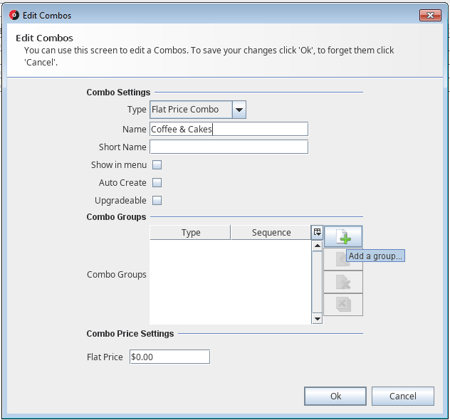
Step Two: Set up Combo Essentials
- Select the desired combo 'Type'.
- Give the combo a 'Name' This name will identify the combo on the receipt for customers, as well as in OfficeMate reports.
- Optionally, set a 'Short Name' for the combo. This will print on the prep dockets for each individual item within the combo.
- Tick 'Show in Menu' to display a button for the combo in WaiterMate.
- Select 'Auto Create' to prompt staff using the POS when a combo is available.
- Select 'Upgradable' to allow one item to be upgraded to a combo deal.
Step Three: Set up Combo Groups
- For the following 'Coffee & Cake' example, two combo groups will be needed:
Group 1: Coffee Group
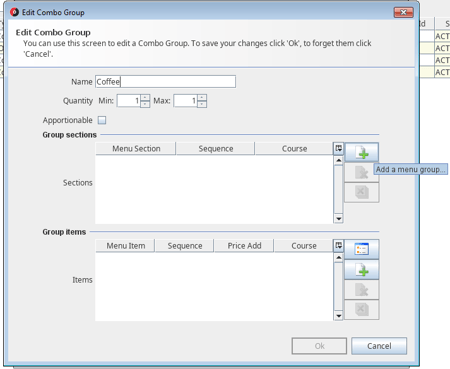
To setup the "Coffee" combo group:
- Click on the " + " (Add) icon to add a new combo group.
- Enter a "Name" for the combo group.
- Set the "Min" and "Max" quantities allowed within the combo group. For example, setting Min:1 and Max: 1 allows the selection of only one coffee item.
- Add items to the combo group by including a whole 'Section' or individual 'Items'. In this case, select the Coffee section to allow a choice of any item within that section.
- Click "Ok" to add this combo group to your combo.
Handy Hint: Adding a "price add" to certain items within a combo group can be a good way to include premium items. A price add will increase the cost of a flat priced combo.
Group 2: Cake Group
To set up the 'Cake' combo group, repeat the steps above, selecting the desired cake section or individual items.
Step 4 - Sequencing
- Once the combo groups have been created, sequence them to determine the order in which staff will be prompt to make selections in WaiterMate.
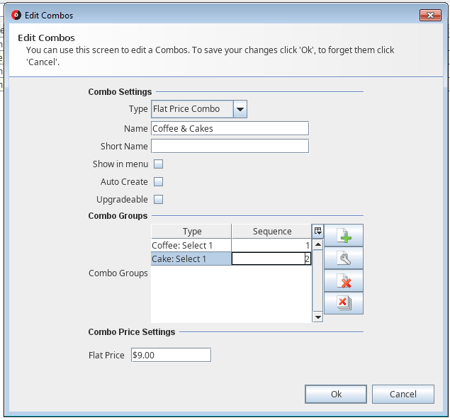
Step 5 - Pricing
- Set the price for a flat-priced combo and select 'OK'.
Handy Hint:
- for a discount Combo, select the discount instead of a flat price.
- For a Free Item Combo, select which combo group contains the free item.
Step 6 - Save
- Once finished, be sure to save the combo.

Additional Actions
- If 'Show in Menu' was selected for the combo, the colour and sequence of the button in WaiterMate can be set.

- The combo system state can be set ACTIVE or INACTIVE to enable or disable the combo.

- Triggers can be added to enable or disable the combo under different conditions.
